Sunday, 26 June 2011

Craft Post - Present Box

Hello everyone!

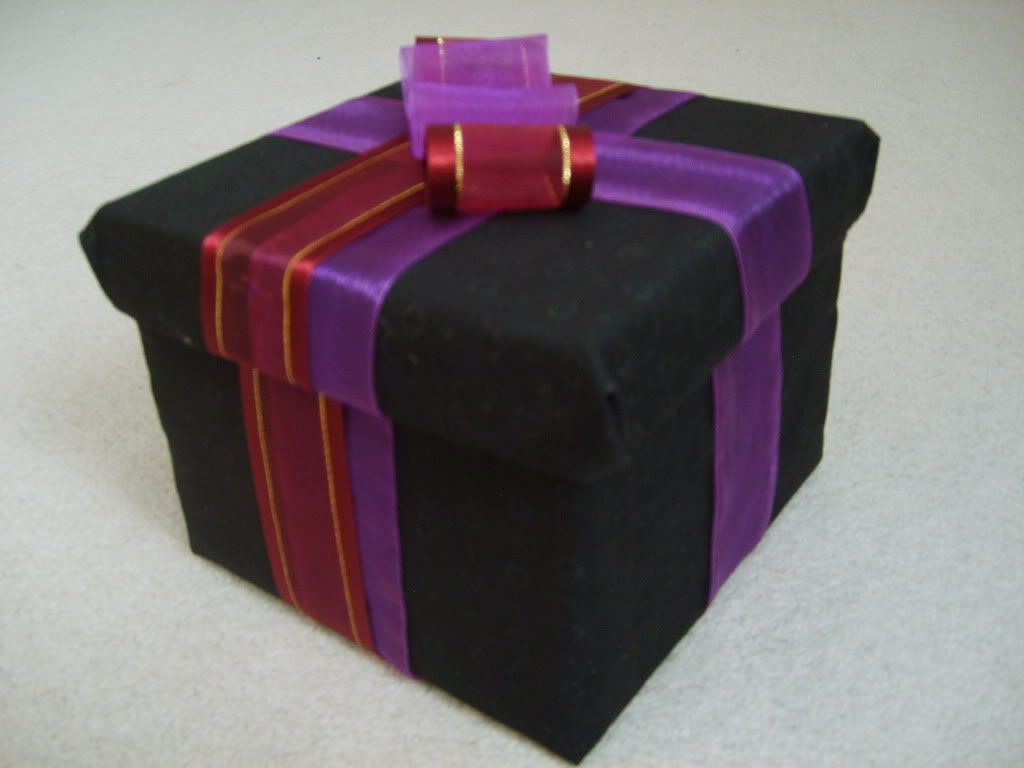
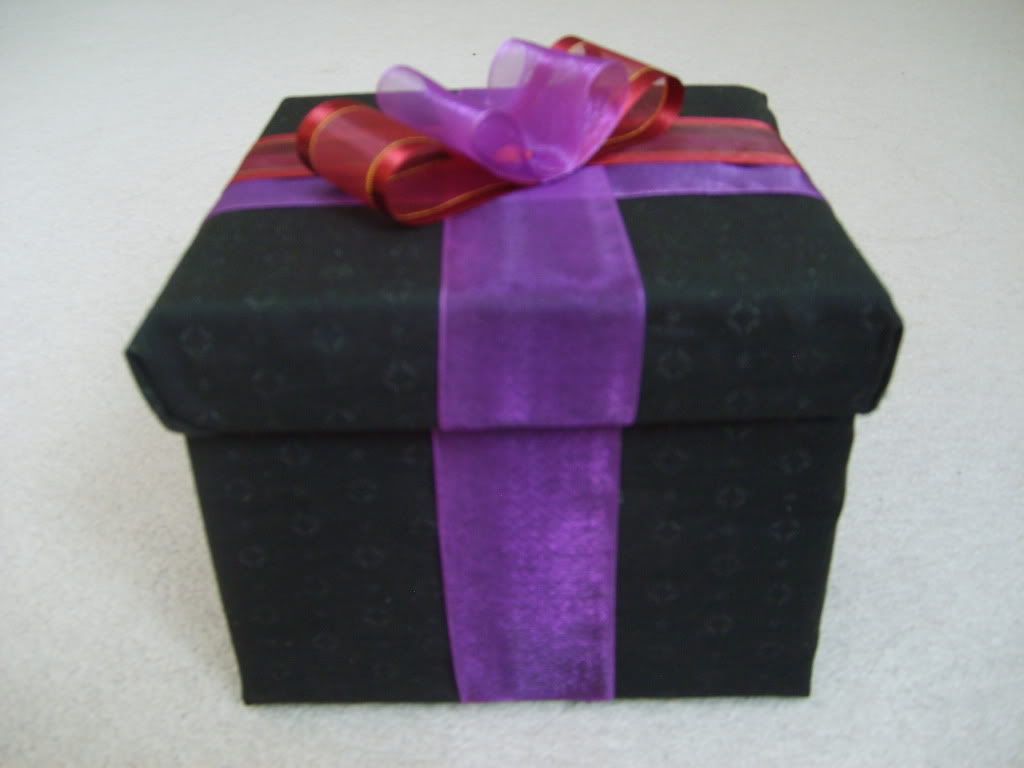
Today's craft post is going to be short and simple. Why short and simple? Well I felt that my room needs some more decor and while coming up with things to make, I remembered the small neglected box that was sitting in my closet collecting dust. The box originally had contained a set made up of a cup and saucer and was given to me by my aunt and uncle. I didn't feel like throwing away the box since I thought it could be put into good use later on and it did (as a present box)! Who knew recycling could feel this good and be this fun?


Materials used:
- box
- fabric (no pretty paper on hand :( )
- ribbons
- scissors
- glue gun
- rhinestone 
- thread
- needle

I didn't take progress pictures since I figured that this would be a "no-brainer". Basically what I did was cover up the box with black fabric and hot glued all the edges inside. I started from the bottom and made my way up (basically I left the top part until the very last). I didn't use the fabric as a whole to cover up the entire box, I cut it into pieces. A piece for the bottom, for the sides of the box, and finally for the top. As an addition, I covered up the inside of the box to make it more prettier (if it looks pretty on the outside, then it might as well look pretty on the inside).


Afterwards, I hot glued on some purple sheer ribbons. Just like with the fabric, I glued the ends of the ribbons on the insides of the top, but for the bottom part I glued the ends on the bottom. I couldn't cover up the bottom since I only had enough ribbon for the top and sides. After gluing on the purple sheer ribbons, I glued on some red sheer ribbons with gold lining that I still had from last year and using the same steps as the purple ribbons. Since the entire box is black, I figured that adding more coloured ribbons would give it more dimension.


Lastly, I used the remaining red and purple ribbons to make a cute little bow to stick onto the top of the box. This is where the sewing comes in. I folded the ribbon inwards and made two loops. I then sew the edges and the middle parts together. I then repeat for the purple ribbon and sew them both together. Finally, I glued a rhinestone onto the top of the bow and glued the bow down.


One room decor down, a few more to go. I really like the present box as a room decor since it is both functional and fashionable. You can have it sitting on a table/shelf/desk and have it storing stuff at the same time. Who doesn't like that type of decor? xD I haven't decided on what to store inside it so it is currently sitting on my shelf looking pretty.

Friday, 24 June 2011

A While's Worth of Contemplating...

Do you ever have a feeling that you are missing something while you are doing your daily tasks? Or do you have one of those moments where you feel that there is no end in sight to the current path that you are traveling on? Or it could be on the opposite side and there is an end in sight, but you don't know where to go next?  Better yet, what if you were lost?

Just recently the thought had hit me. Okay, I lied. It wasn't just recently, but it had lingered in my mind for a while now. I just haven't paid attention to it until now. Now I know that all I had been doing recently was just straight crafting, but what would happen if I have actually run out of things to craft on? Better yet, what if I have run out of ideas? Chances were that if that were to happen, I wouldn't write it off as a lost cause. If anything, the ideas might come back eventually. How long is eventually I don't know and I will probably never know. It is one of those questions that never get answered for all of the mysteriousness surrounding them. As for running out of things to craft on, it happens or it can happen. It has happened to people before me and it will happen to me as well. A matter of when is questionable, since it feels like that I have tons to do right now but it creeps ever closer for every crafting project done. I think that the best thing that I can do when it comes to things like these is to just keep on crafting and when it happens, face it with a smile and some happy thoughts. I mean no use moping over it when there is plenty more things to do out there. Who knows, my inspiration for crafting might come back after I'm done with other things. But that isn't until way later, which I am fortunate for.

However, the question still arise. What would happen if I have actually run out of things to craft on? Now you are probably thinking: "Didn't you already answer that question in the last section?". I did, but I had only answered the question directly. I did not address the implications of actually finishing up all the wanted and thought-of projects and what happens afterwards. Chances are, I probably won't be just straight crafting until I get to Hime-hood. Not only is it unrealistic, but it's not just only pretty things that makes up a himegyaru. With that being the case, what happens afterward? That, as often quoted by the famous Shakespeare play Hamlet, is the question.

I guess it is at this part that I did the most contemplating and also where a thing called goals comes in. Usually I am not a fan of writing down my goals, considering that I feel no dire need to and I feel like I don't really have that many goals in the first place (I mean all I really need to do in order to accomplish my goals is to just clean my room and craft right? Right??). Turns out that I had underestimated the actual number of goals that I have. Like I had said before, being a himegyaru isn't all about having pretty things and a pretty room to live in. There is also makeup, hair, nails, etc. So I decided that for the sake of my mind (and to keep track), I will keep a list of goals handy.

Goals

- Clean my room  (Ideal look: shop format)

- Craft projects 
- Things
     Decorate or make room decor (lamp, clock, phone, any cute items)
     Make pillows 
- Clothes 
     Decorate most of current clothes except for ones bought from Taobao
     Make heart/star/dog/etc. shaped bags 

- Makeup
     Know basic makeup routine
     Buy required products and look up reviews 
     Look up himegyaru makeup tutorials and magazine scans
     Practice routine 

- Nails
     Practice nail designs
     Develop routine 

- Hair 
     Practice bouffant hairstyle
     Get into hair curling habit 
     Experiment with different hairstyles  

- Personality        
     Smile more
     Be more social/talk more 
     Manners and etiquette
     Have more confidence 
     Know right words to say 

As you can clearly see, definitely more than cleaning my room and crafting. Looks like I have my work cut out for me. Will see what happens later.        

Wednesday, 22 June 2011

Hime Accessories Galore

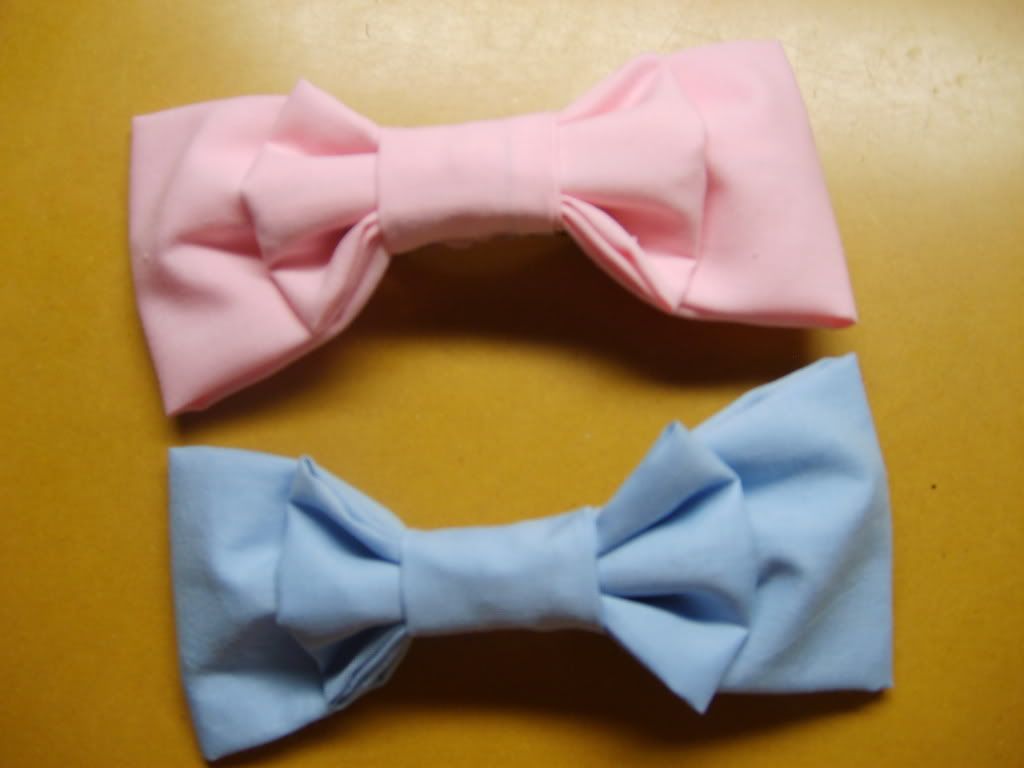
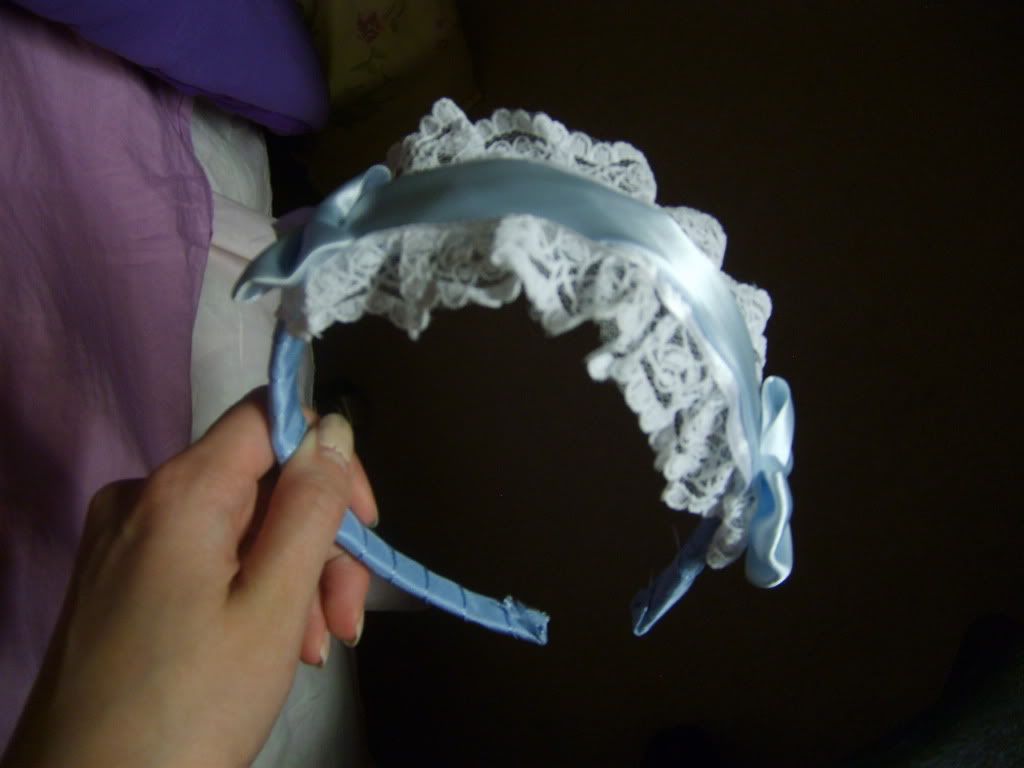
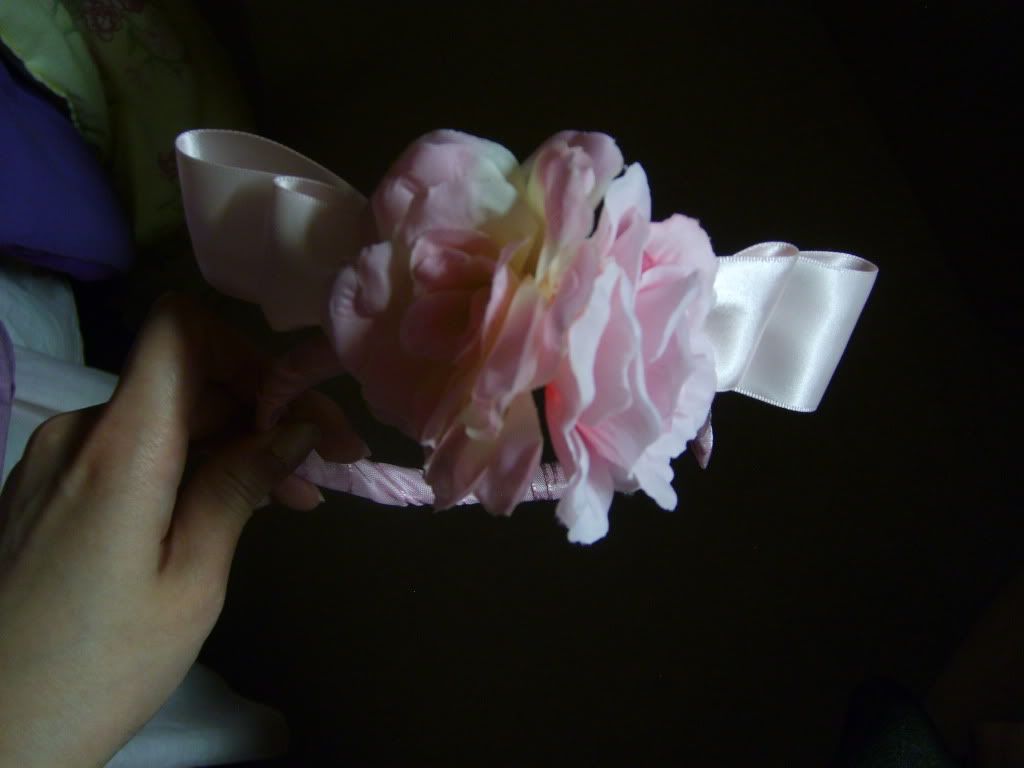
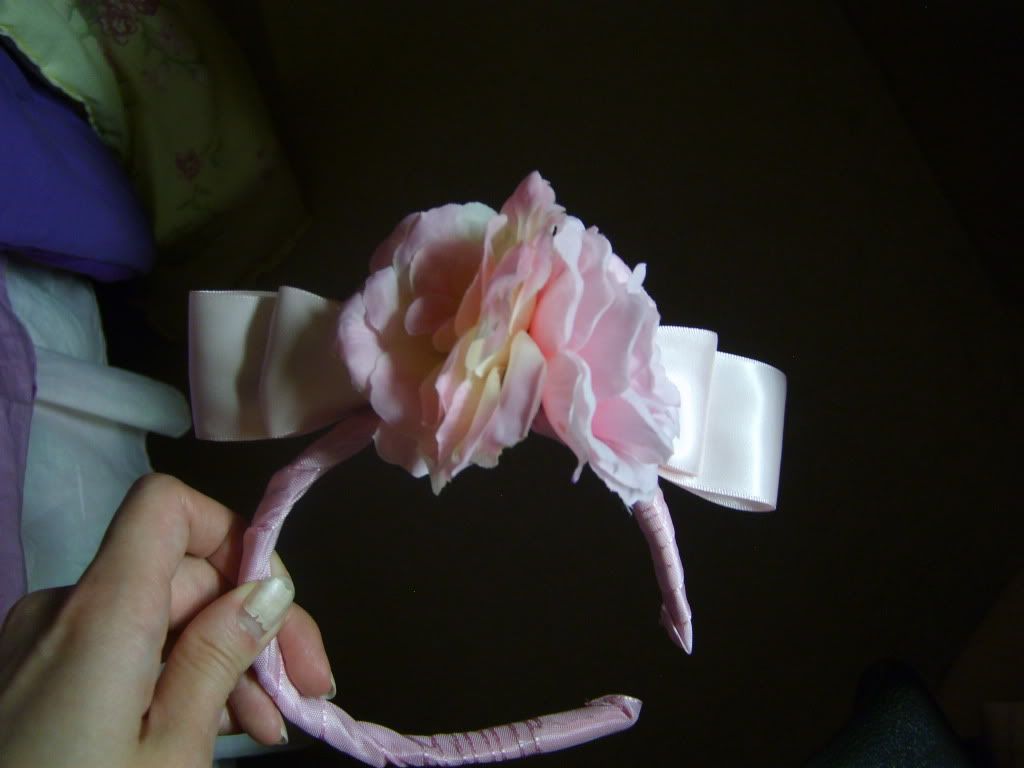
Sorry again for the late post, but I was busy for a few days trying to come up with some designs for some headbands that I had redone (they originally came in a set of 3 purple headbands). The reason why I was trying to come up with different designs was because I wanted both of the headbands to be different from the typical bow headband, since I had just recently made some hime bows after all and it will get a little bit redundant if I keep attaching bows to each hair accessory. The designs themselves aren't exactly new (but then again, it seems that it is getting harder to come up with something original nowadays) and are inspired by a few things, which you will see later on when I show them. In addition, I would like to say that the headband wrapped in ribbon idea came from The Princess in Training (thank you for the wonderful idea and inspiration!). Before I show the headbands however, I would like to show the rest of the hime bows that I had made since the last post (where I had essentially promised on making a pink and blue one).


They turned out very nicely, but when lining these two bows up with the previous one that I had made, it seems that the blue one is smaller than the purple and pink ones. I personally blame it on size  inaccuracies.

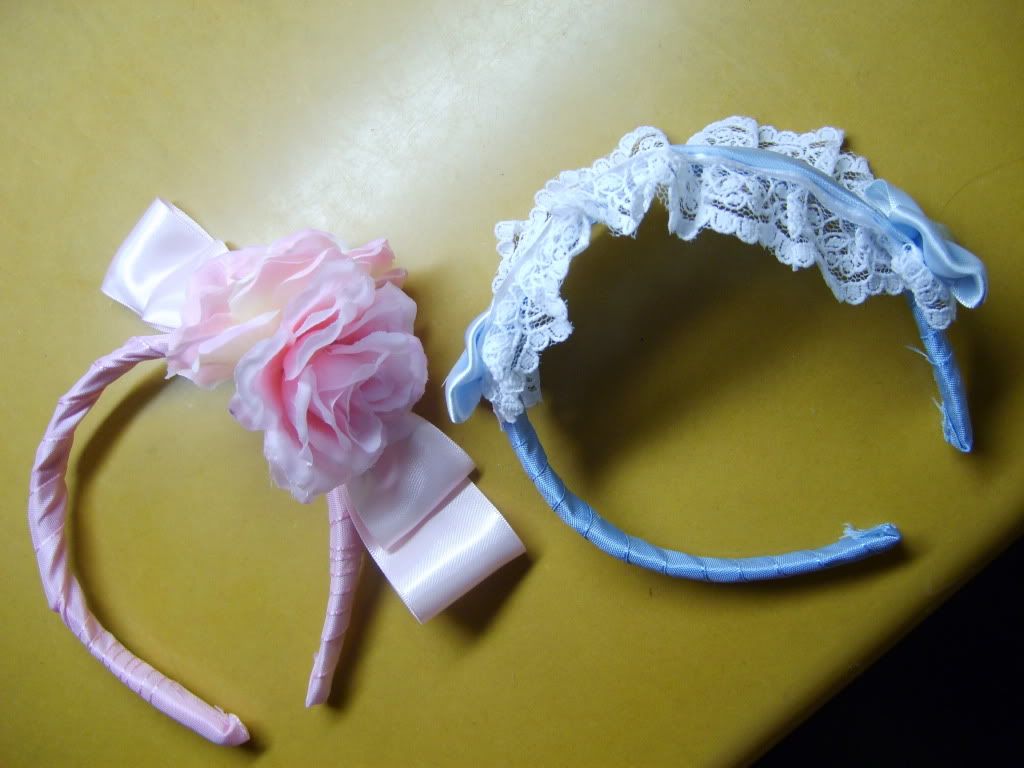
Now here are the long awaited headbands:


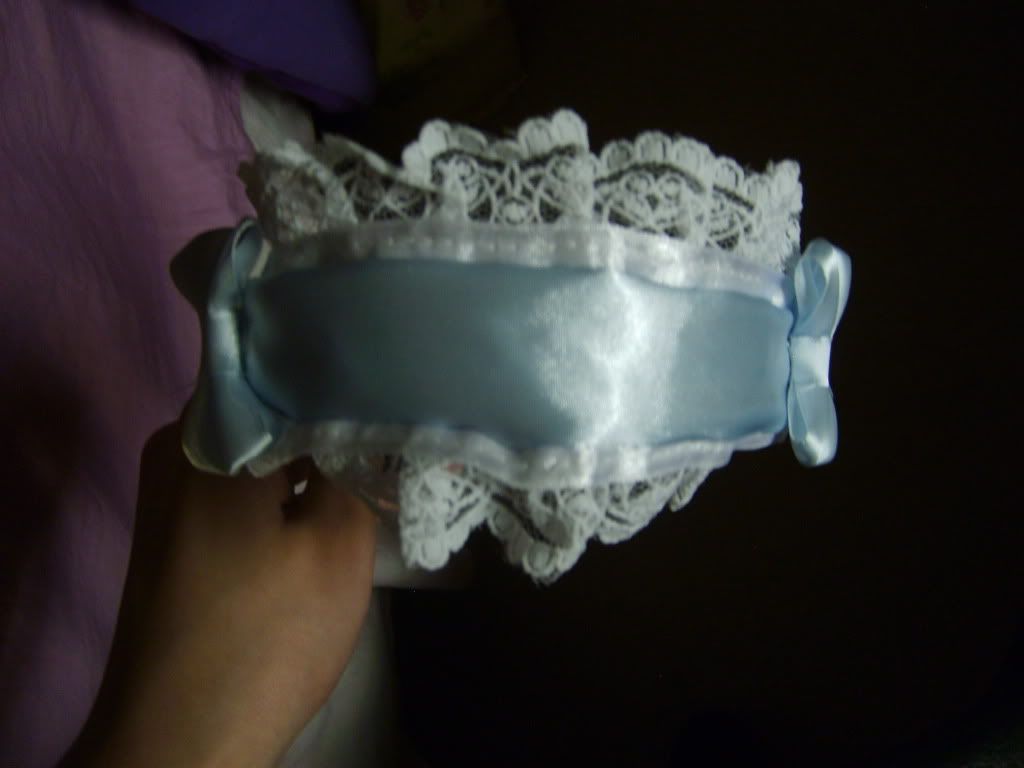
What do you think? Out of the both of them, I personally think that the pink one looks weirder than the blue one due to the upright position. At first I had wanted to attach only one flower, but due to a lack of a flat bottom it got very hard to attach just only one flower (at least hard enough to attach it while at the same time trying not to make it look out of place) so I decided to glue 2 of them back to back. As for the blue one, it reminds me a lot of one of those lolita bonnets. However the headband was not actually inspired by the bonnet rectangular headdress, rather it was inspired by those big lacy lolita bows found on the headbands. Unfortunately the "bow" didn't turn out right in the end so I just ended up gluing the whole "lace strap" onto the headband and attaching some bows onto the ends. Overall, I am pretty satisfied with them and am happy that I now have a pink and a blue headband :).

Tuesday, 14 June 2011

Craft Post - Hime Bow Hairclip

For a long while now I have always wanted to get my hands on one of those gigantic bows that every himegyaru seem to have clipped onto their bouffants. Like these ones:


Remember that large Taobao order that I had made a while ago? (I know you probably don't, but let's just say for the sake of the blog that you did) Two of the things that I had ordered went out of stock and one of them were some JD replica bows that I had ordered from a shop called Rebecca :(. After a few days of scouring around the website, I couldn't find any other bows that looked closely like the ones at Rebecca so I gave up. It doesn't help matters either that there were some stolen photos and no actual photos of the items themselves -.-.

It wasn't until a few days ago that I thought: "well if I can't buy one, I might as well make one". I mean if you look at the above picture, the bows in the picture doesn't look hard to make. So make one I did.


Wednesday, 8 June 2011

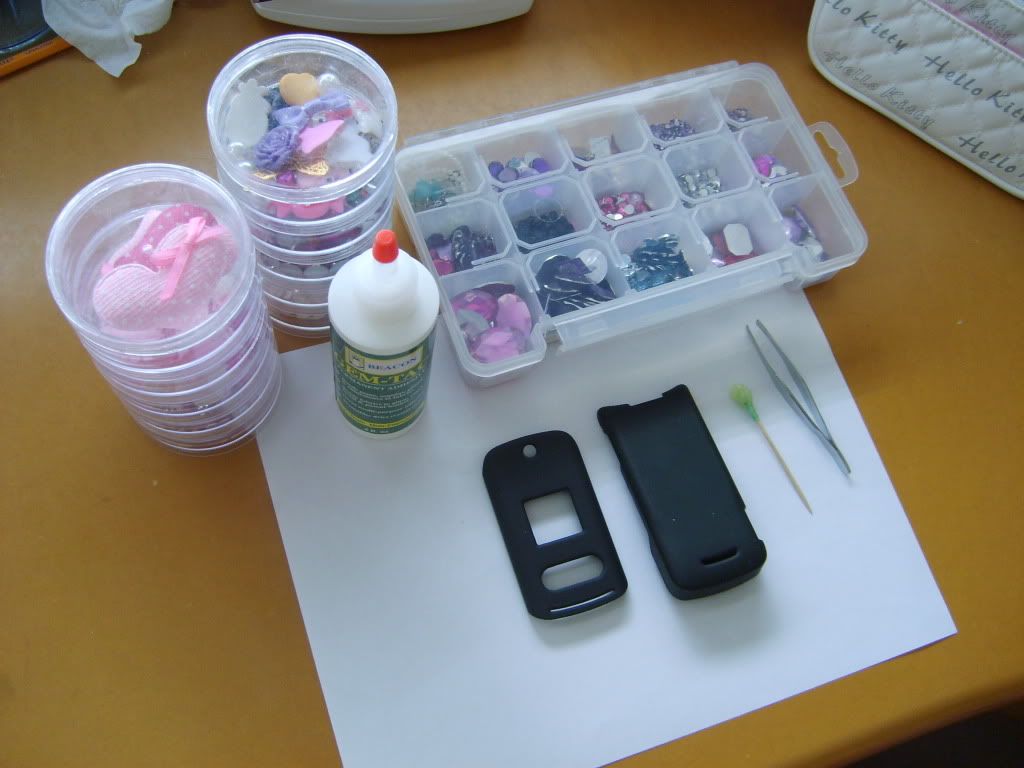
Deco Post - Cell Phone Case Redo

Sorry for the extremely late post, but it turned out that my latest project (which I will be talking about in this post later on and is hinted in the title) took longer than expected ^^;. I haven't done a deco project in such a long time, so I decided on redecorating my phone case. It doesn't help matters that I had finally received the glue that I had bought from eBay (that and my desk is now significantly more cleaner). The urge to deco something went way up after that. 

Now I had named this post as a redo since this wasn't the very first time that I had decorated my phone case. I had actually decorated the case a while back, probably around a year or two. Why did it take this long to redecorate my phone case then? Better yet, why redecorate at all?  Well the first time around, the glue that I used (Clear Gel Tacky Glue) didn't hold down the rhinestones and bigger gems for a long period of time. Actually it didn't hold them down at all. -.- I was so disappointed... So knowing that any attempt to using the phone case will just lead to more fallen rhinestones and gems, I decided to redecorate but couldn't until recently. For one thing, I didn't have any glue other than my epoxy (which I had already used up most of it on my sister's DS lite case). For another thing, I didn't feel like slowly taking off the gems one by one until recently, since that would be very tedious work and we all get our lazy moments. I guess in a way, redecorating my phone case is a way to free up more space, since up until now it had been doing nothing except collecting dust on a shelf ^^;.

Anyway, the total time it took to finish up this project was 3 days. Yup! 3 days! I know that I could've finished this sooner, but with projects like these I am usually slower than the average person and my perfectionist tendencies tend to get a hold of me, since this case was heavily inspired from Luxaddiction and I want it to look almost like the cases on the website. Technically the case was finished in 2 days, but it is 3 days including finishing touches.

I apologize if some of the photos seem a little bit blurry.


Wednesday, 1 June 2011

Taobao Review Part 2

A few nights ago I went to this performance that was celebrating the 25th anniversary of the Fukienese Association of Calgary and apparently 25 years since the opening of their school, Red Dance Shoes School, which I had gleamed from one of the introductory speeches (which felt veeery long >.< there were around 4-5 speeches in total!). Most of the performers came from the Red Dance Shoes School, but there were also a few from the Tai Chi Association and even from Ukraine. What I had really liked about the performance was the incorporation of a few traditional Chinese instruments such as the pipa and the guzheng or zither, since I rarely see any of these instruments around and it brings a fresh perspective on the whole performance. Those Ukrainian performers sure know how to dance, since their performance was the longest and they did not one but two performances. Kudos to them ^^.


Related Posts Plugin for WordPress, Blogger...