
As I had mentioned before on a couple of previous posts, I was and am still planning a crafting post sometime later. Finally, I had done one, and I am quite eager to share what I had created in this post! I wanted to start out small, since I have not crafted in awhile. So why not start out with this plain ID card holder/tag?
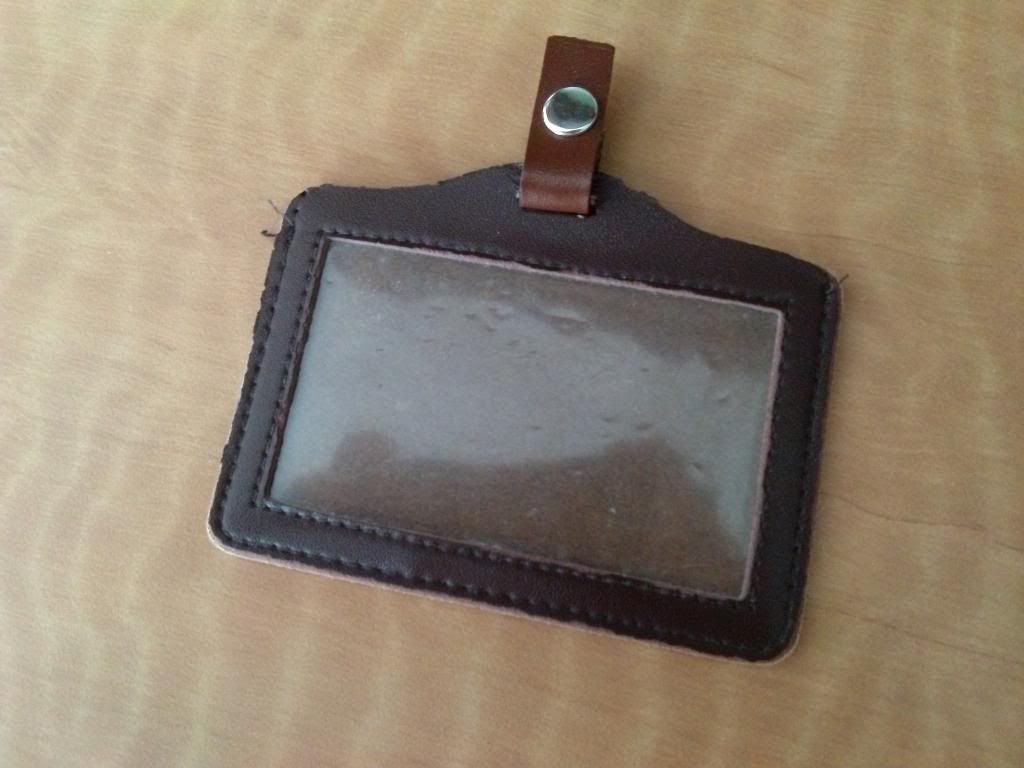

This ID card holder was one of the numerous gifts that was given to me from my grandmother during one of her annual trips to China. It did not occur to me how frequent I was using it until typing up this post, since I often use transit. Actually, it is a combination of that and honestly not feeling like constantly pulling out my wallet out and having to dig around in the numerous pocket slots for the bus pass. The ID holder originally had a clip on the strip end of the ID holder that allows the ID to be clipped onto a top or shirt, but came off after a combination of moderate usage and some rough handling. I don't even bother clipping the ID holder onto anything, so it didn't really bug me, and I usually store the ID holder in a separate bag pocket anyway. However, after constant usage of the ID holder, I do realize that it is quite plain. So why not revamp it up Hime-style?
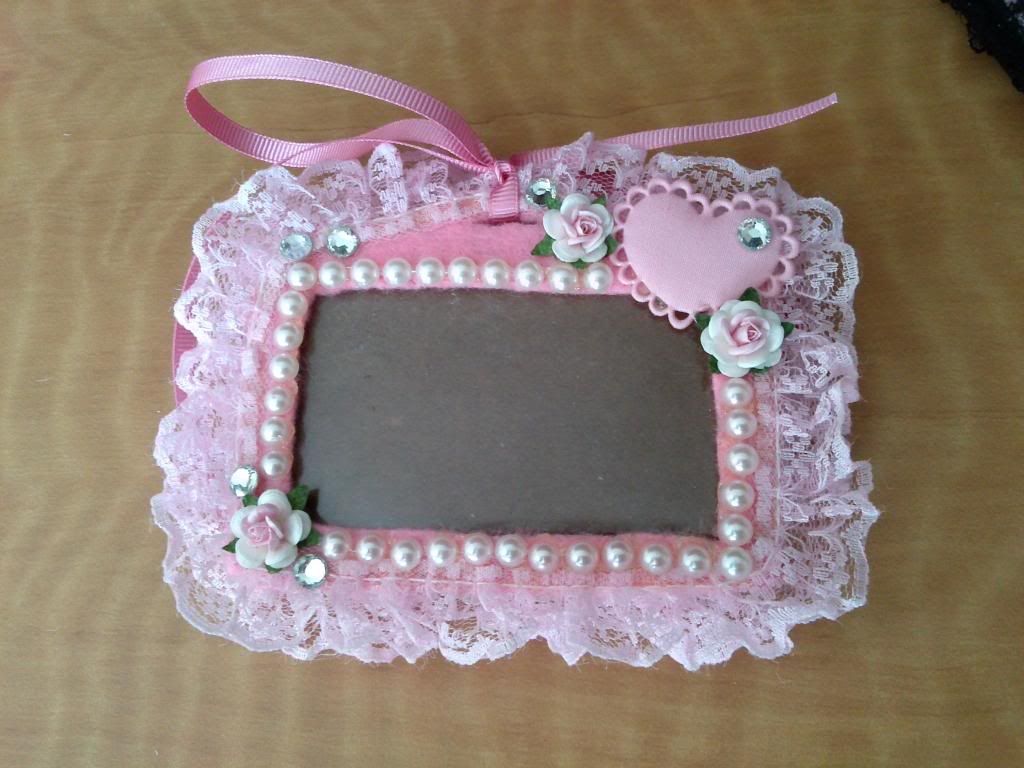
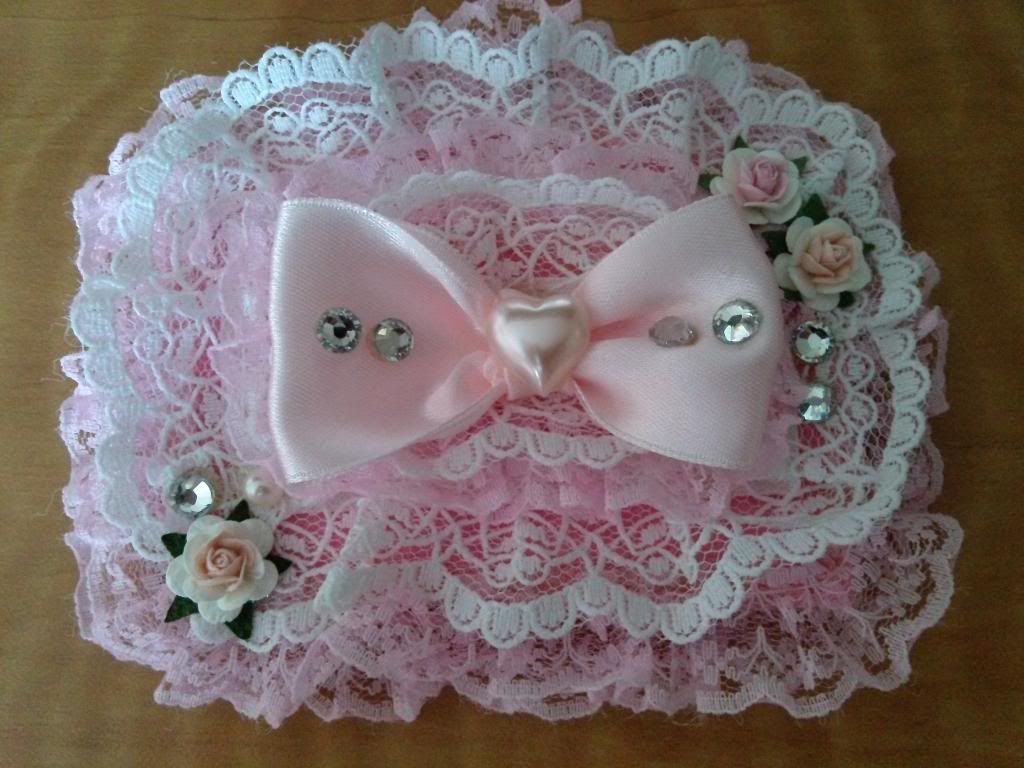
After some delicate and careful work, this is what I had gotten as a result!
 What you are going to need...
Step 1
After some delicate and careful work, this is what I had gotten as a result!
- ID card holder/tag (naturally!)
- Any Deco material (bows, lace trim, pearls, roses, stuffed hearts, rhinestones, etc.)
- Felt paper
- Glue gun
- Scissors
- Needle and thread (optional)
- Ribbon (optional)
- Other needles (optional)
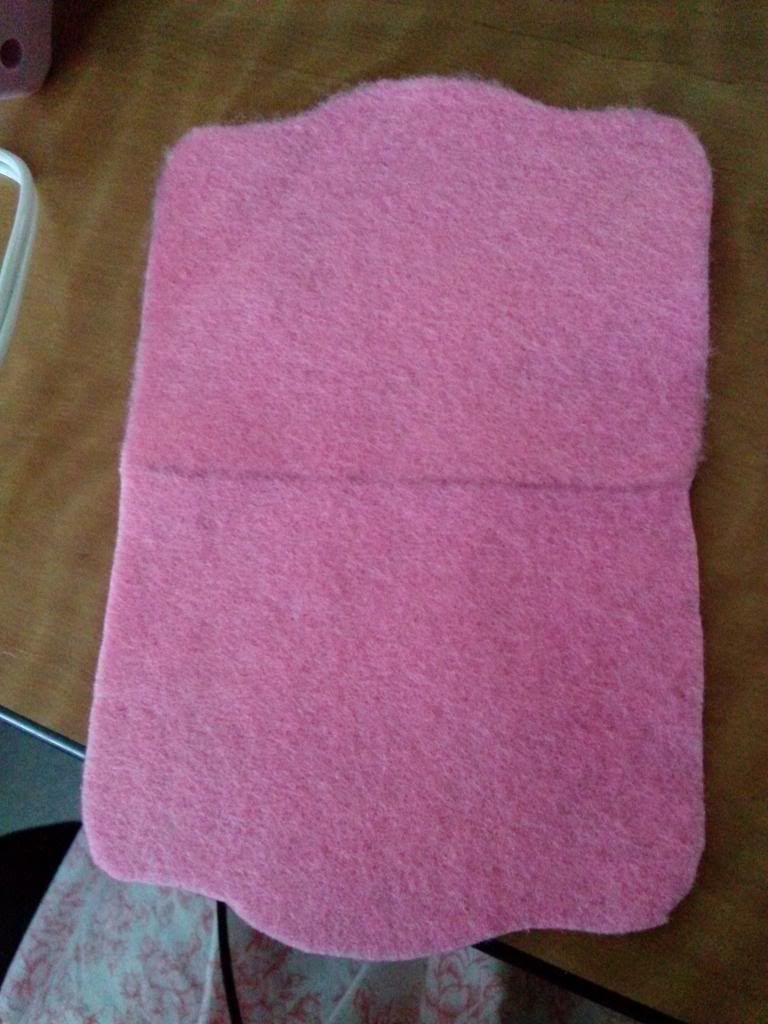
Step 1
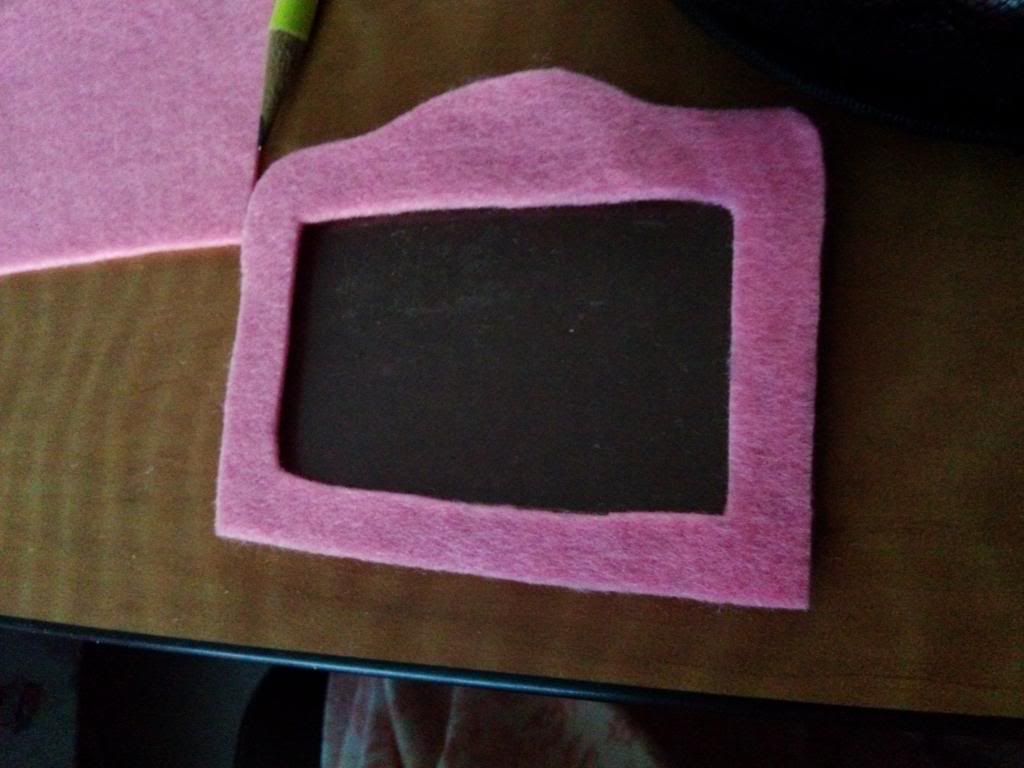
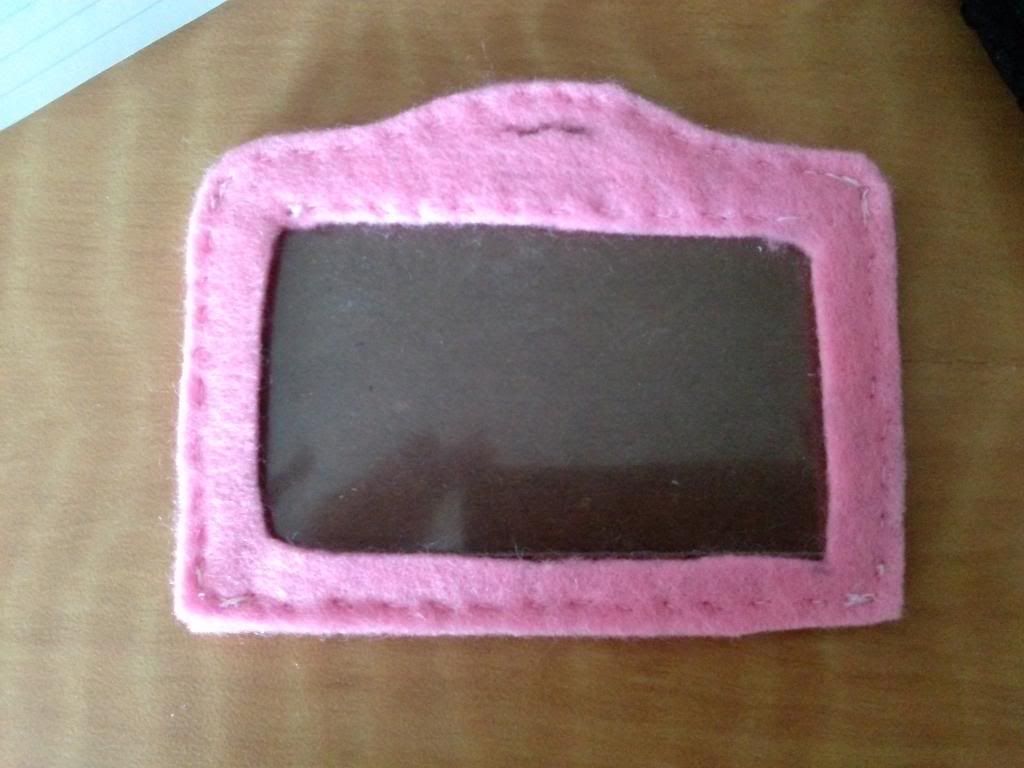
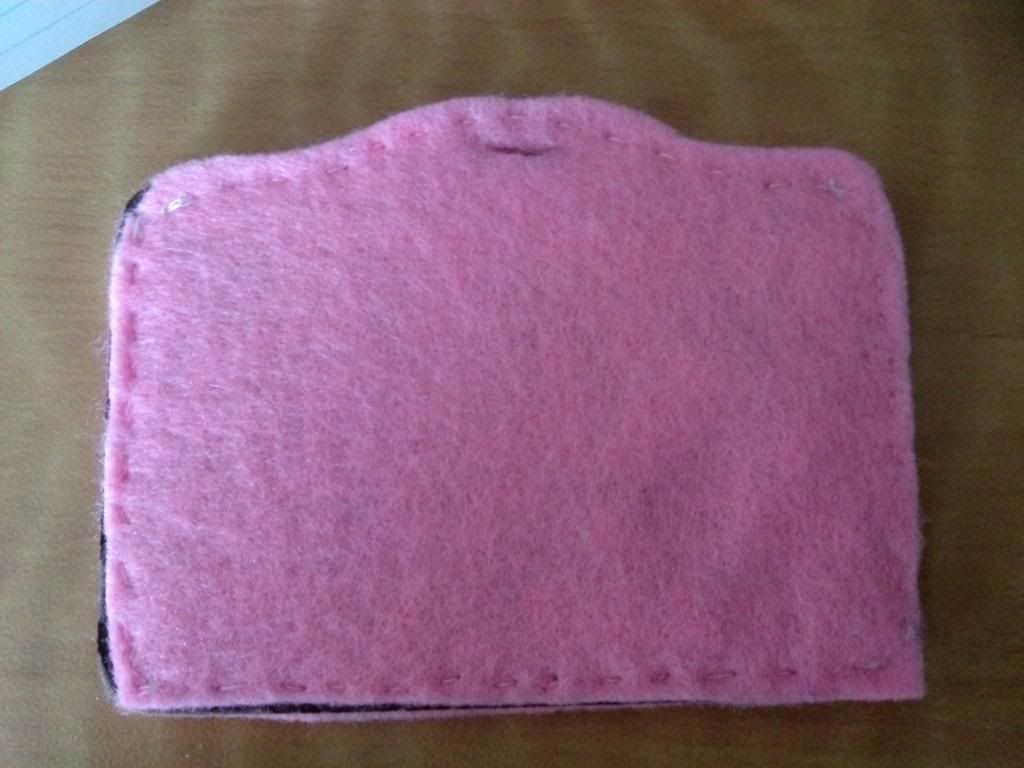
Before doing any real Deco work, we will need to cover up the ID holder. This is where the felt paper comes in. Trace the shape of the ID holder onto the felt paper and fold the paper in half. Start cutting around the shape. Pin with needles if necessary. Make sure to cut out an outline for the clear plastic "screen" to show through, as shown in the second picture.
Step 2
Now that you had gotten your shape, start gluing the shapes onto the ID holder. In this case because the thickness of the leather wasn't all that thick, I had just sewn on the shapes instead.
Step 3
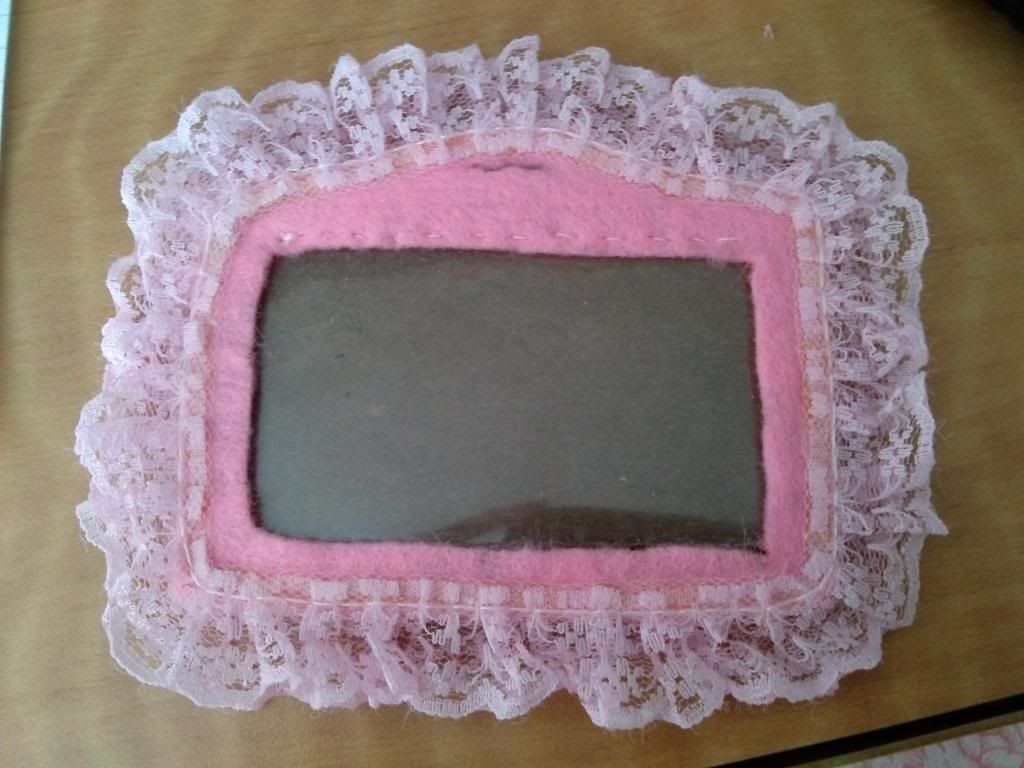
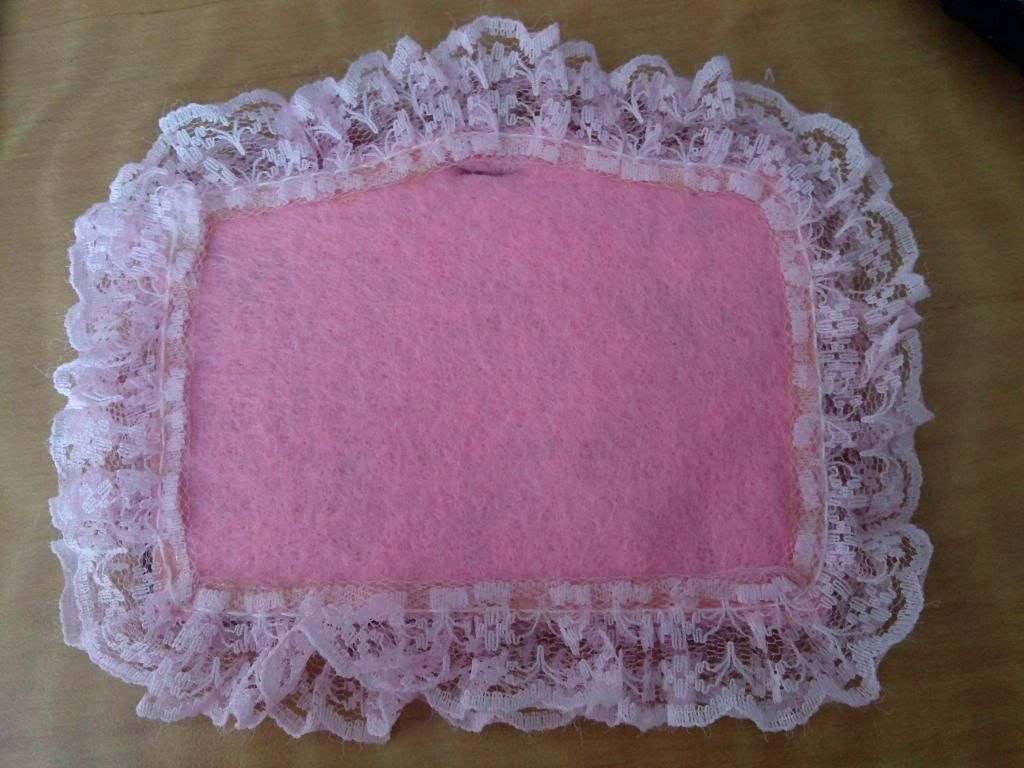
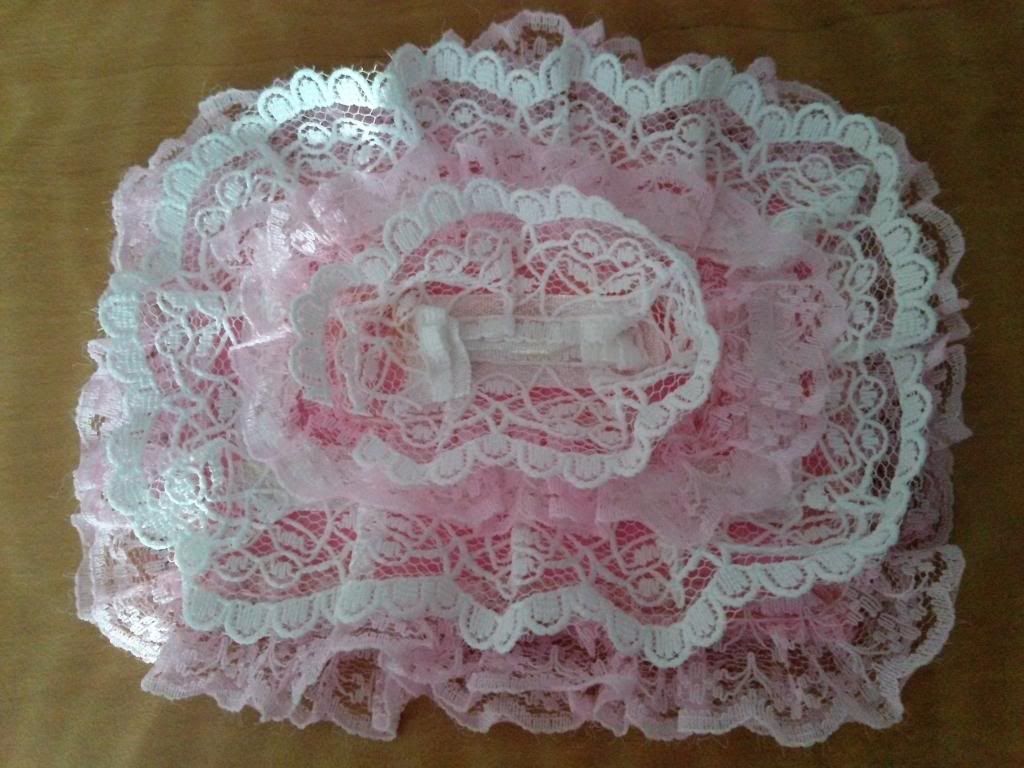
Use the lace trim and glue it around the ID holder like a border. Do the same thing on the other side.

Use the lace trim and glue it around the ID holder like a border. Do the same thing on the other side.

Step 4
Glue the lace trim around the ID holder in smaller borders. Repeat until you get to the center of the ID holder or have covered the entire surface as shown.
Glue the lace trim around the ID holder in smaller borders. Repeat until you get to the center of the ID holder or have covered the entire surface as shown.
Step 5
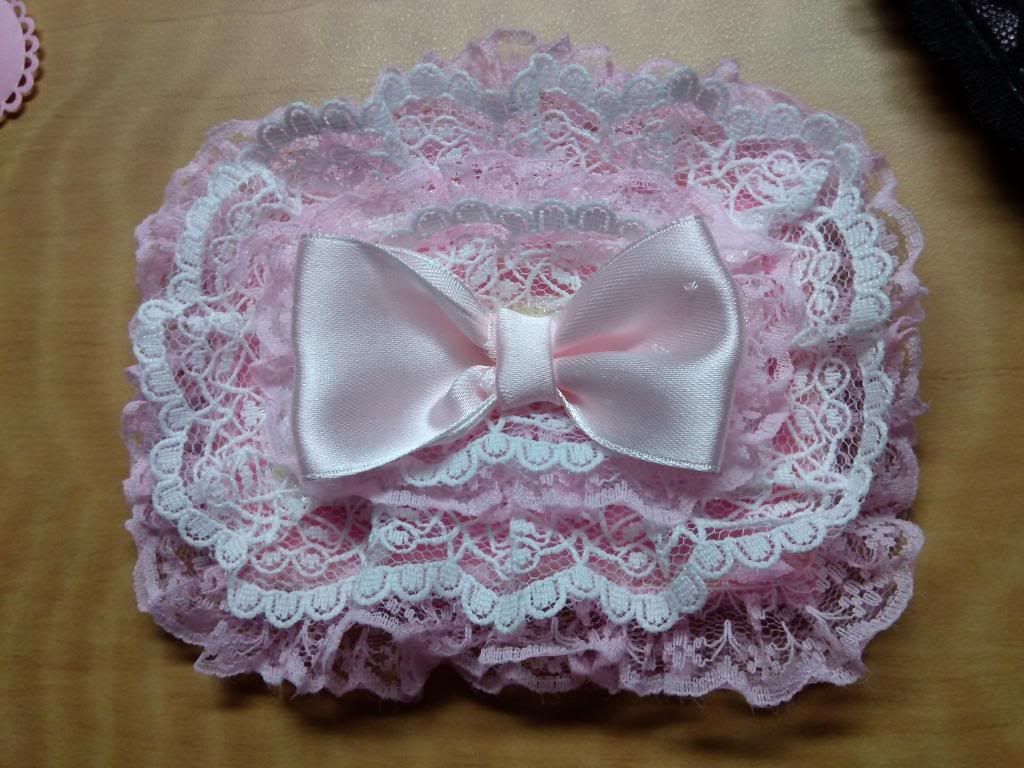
Glue a large centerpiece of your choice on top of the center lace border. In this case, I decided to use a small baby pink bow that I had made a couple of weeks ago. Though you don't necessarily have to use a bow. Something like a puffed heart or roses would work just as well.
Glue a large centerpiece of your choice on top of the center lace border. In this case, I decided to use a small baby pink bow that I had made a couple of weeks ago. Though you don't necessarily have to use a bow. Something like a puffed heart or roses would work just as well.
Step 6 (last step)
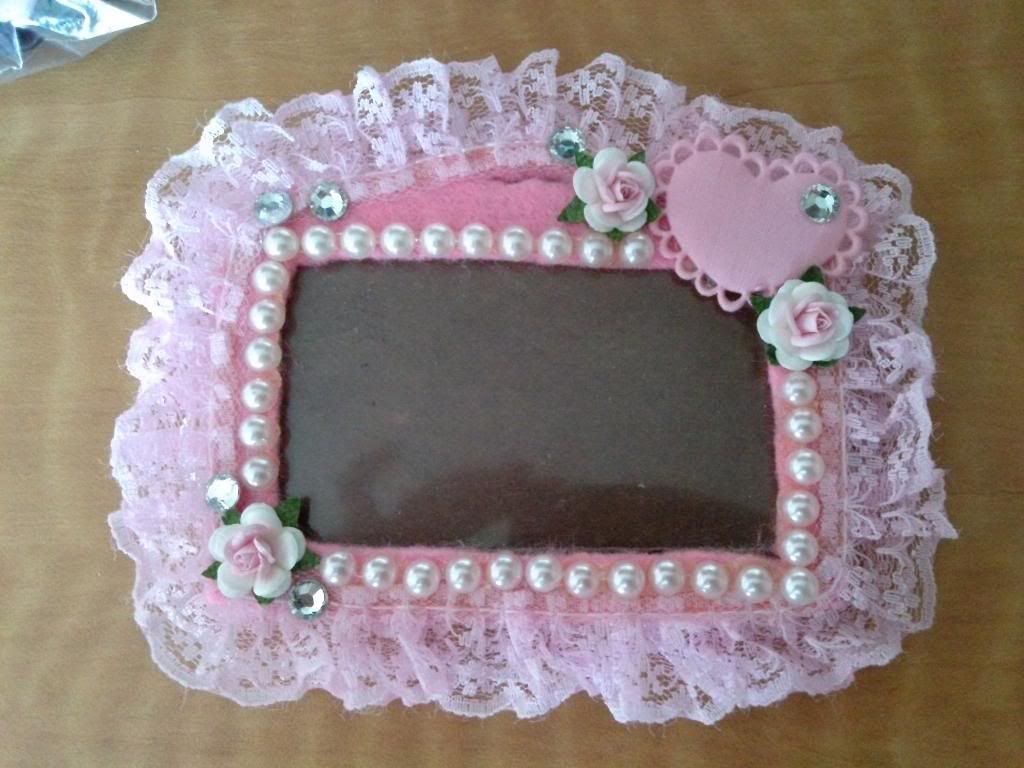
Now this is where you can have some artistic freedom, since from here on out you are just going to be just sticking a bunch of stuff onto different places. As for me, I just used a couple of small roses and lined the face with pearls. In addition to using a puffed heart on the front, I had added a pearl heart as part of the centerpiece for more detail. As for finishing touches, I had added a couple of clear rhinestones here and there. I decided to do away with the strip holding the ID holder together, since it could not fit through the hole anymore. Instead, I simply tied it up with a pink ribbon, and I personally like it more that way.
Overall, I am quite satisfied with my new ID holder, and cannot wait to tackle on bigger projects!


Oh *_* It's so cute! Well done!!! :)
ReplyDeleteThank you! ^o^
DeleteAaa, that is so cute! I just toss things like that around in my backpack though, so all the pretty stuff would probably get caught on things and rip off. ;-; haha
ReplyDeleteAww thank you! <3 I usually put my ID in a separate compartment for easier access, so it does not really bother me as much! Haha!
DeleteSuper super cute Wanda! You did a nice job :)
ReplyDeleteThank you Emma! ^^
Delete